4.4 KiB
Create an eye material
Create an Eye shader material
New Materials in HDRP use the Lit Shader by default. To create an Eye Material:
- In the Unity Editor, navigate to your Project's Asset window.
- Right-click the Asset Window and select Create > Material. This adds a new Material to your Unity Project’s Asset folder.
- Click the Shader drop-down at the top of the Material Inspector, and select HDRP > Eye.
This Eye Material uses the sample Eye Shader Graph. You can only use this Material with the built-in Eye mesh in the Eye Prefab. To create a new Eye Shader graph from scratch, see Eye Master Stack.
Create an Eye Shader Graph
To create an Eye material in Shader Graph, use one of the following methods:
-
Modify an existing Shader Graph:
- Open the Shader Graph in the Shader Editor.
- In Graph Settings, select the HDRP Target. If there isn't one, go to Active Targets, click the Plus button, and select HDRP.
- In the Material drop-down, select Eye.
-
Create a new Shader Graph:
- Go to Assets > Create > Shader Graph > HDRP and click Eye Shader Graph.
Eye Prefab
To use the sample Eye Shader Graph, you need to use the Eye Prefab from HDRP’s sample Eye scene in your own project. This is because the Eye Shader Graph is dependent on vertex positions in the sample eye mesh which exists in the Eye Prefab. Because of this, HDRP’s Eye Shader Graph isn’t compatible with custom meshes.
To use the sample Eye Shader Graph:
- Install the Material Samples project.
- Open the Eye sample scene.
- Import the Eye Prefab into your project.
You can also create your own custom Textures for the Eye Shader Graph. For more information see Eye Textures.
Install the Material Samples project
HDRP includes four sample eyes of different sizes in the Eye sample scene. This scene exists in HDRP’s Material Samples. To install the Material Samples:
- Open the Package Manager window (Window > Package Manager).
- Open the Packages menu and select the In Project context.
- Select the High Definition RP package.
- Expand the Samples dropdown.
- Next to Material Samples, select Import.
Open the Eye sample scene
To open the Eye sample scene:
- In the Project window, go to the Assets > Samples > High Definition RP. Open the folder that matches your current Unity version number, then open Material Samples.
- Right-click the Eye scene and select Open.
Import the Eye Prefab into your project
To import one of the HDRP sample Eye Prefabs into your scene:
- Open your own scene from the Hierarchy window (if you don’t have a scene, go to Assets > Scene and give it a name in the Project window).
- In the Project window, go to Assets > Samples > High Definition RP. Open the folder that matches your current Unity version number, then open Material Samples > Prefabs.
- Click and drag one of the four Eye Variant Prefabs into the Hierarchy window.
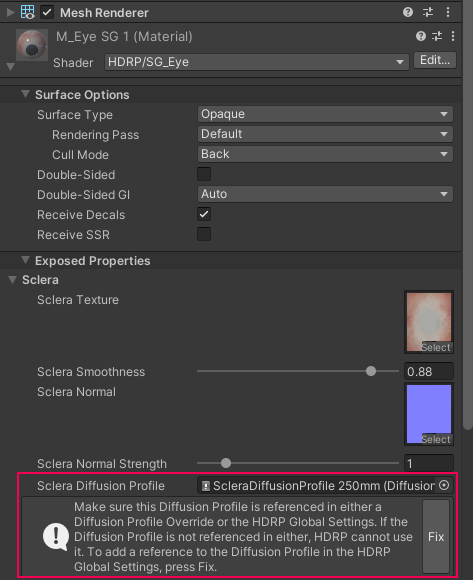
Tip: When the eye appears in your scene, it might have a green tint. To remove this green tint, fix the Eye Material’s diffusion profiles:
- Select the Eye Prefab in the Hierarchy window.
- In the Inspector window, find the Material that begins with M_EyeSG and open the dropdown underneath it.
- Expand Exposed Properties > Sclera
- In the information box below Sclera Diffusion Profile, click Fix.
- Repeat these steps for the Iris Diffusion Profile in the Inspector under Exposed Properties.
 Inspector window with the Sclera Diffusion Profile fix option highlighted.
Eye Textures
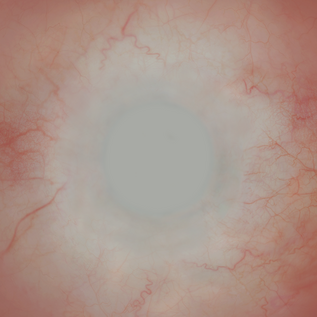
You must provide seperate Texture maps for the Iris and Sclera. This is because of the way that properties for subsurface scattering, limbal ring, smoothness, and other surface information blends between the Iris and Sclera. This means you need to create a Sclera map with no Iris information, and an Iris map with no Sclera information:

