6.9 KiB
Antialiasing in the High Definition Render Pipeline
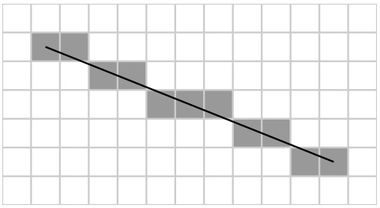
Aliasing is a side effect that happens when a digital sampler samples real-world information and attempts to digitize it. For example, when you sample audio or video, aliasing means that the shape of the digital signal doesn't match the shape of the original signal.
This is most obvious if you compare the original and digital signals for an audio source at its highest frequencies, or a visual source in its smallest details. Regular signal processing uses the Nyquist rate to avoid aliasing, however it's not practical for image rendering because it's resource intensive.
An example of the rasterization process creating some aliasing.
To prevent aliasing, the High Definition Render Pipeline (HDRP) has multiple methods of antialiasing, each with their own effectiveness and resource intensity. The antialiasing methods available are:
- Fast approximate antialiasing (FXAA).
- Temporal antialiasing (TAA).
- Subpixel morphological antialiasing (SMAA).
- Multi-sample antialiasing (MSAA).
Using antialiasing
Antialiasing is a per-Camera effect which means that you can have Cameras that use different antialiasing methods. This is useful if you have low priority secondary Cameras that can use a lower quality antialiasing effect with a lower resource intensity.
Fast approximate antialiasing (FXAA)
FXAA smooths edges on a per-pixel level. This is the least resource intensive antialiasing technique in HDRP and slightly blurs the final image. It doesn't work well with Scenes that include a lot of specular lighting.
To select FXAA for a Camera:
- Select the Camera in the Scene view or Hierarchy and view it in the Inspector.
- In the General section, select Fast Approximate Antialiasing (FXAA) from the Antialiasing drop-down.
Temporal antialiasing (TAA)
TAA uses frames from a history buffer to smooth edges more effectively than FXAA. It's better at smoothing edges in motion, but you must enable motion vectors for this. For information on how to set up motion vectors in HDRP, see motion vectors. Because TAA is temporal, it often creates ghosting artifacts in extreme situations, such as when a GameObject moves quickly in front of a surface that contrasts with it.
Note: Enabling TAA helps to improve the quality of some effects like Ambient Occlusion or Volumetrics.
To select TAA for a Camera:
- Select the Camera in the Scene view or Hierarchy and view it in the Inspector.
- In the General section, select Temporal Antialiasing (TAA) from the Antialiasing drop-down.
When using the same Camera GameObject for multiple Game Views TAA may not work as expected due to limitations of the history buffer system. Multiple game views using different Cameras, however, work as expected.
Limitations
In the Editor, if multiple Game views use the same Camera, TAA may not work as expected due to limitations of the history buffer system. However, if you use multiple Game views, where each Game view uses a unique Camera, TAA works as expected.
The following features cannot be used with TAA:
- Multisample anti-aliasing (MSAA)
- Dynamic Resolution
Subpixel morphological antialiasing (SMAA)
SMAA finds patterns in the borders of an image and blends the pixels on these borders according to the pattern it finds. This antialiasing method has much sharper results than FXAA and is well suited for flat, cartoon-like, or clean art styles.
To select SMAA for a Camera:
- Select the Camera in the Scene view or Hierarchy and view it in the Inspector.
- In the General section, select Subpixel Morphological Antialiasing (SMAA) from the Antialiasing drop-down.
Multi-sample antialiasing (MSAA)
MSAA samples multiple locations within every pixel and combines these samples to produce the final pixel. This is better at solving aliasing issues than the other techniques, but it's much more resource intensive. Crucially, MSAA solves spatial aliasing issues. MSAA is a hardware antialiasing method that you can use in tandem with other methods, which are post-processing effects. The exception to this is temporal antialiasing because it uses motion vectors, which MSAA doesn't support.
To enable MSAA in your HDRP project:
- Open your HDRP Asset.
- In the Rendering section, set the Lit Shader Mode to either Both or Forward Only. HDRP only supports MSAA for forward rendering.
- Use the Multisample Antialiasing Quality drop-down to define how many samples HDRP computes per pixel when it evaluates MSAA. Select None to disable MSAA support
When you use MSAA, be aware of the following:
- Increasing the sample count makes the MSAA effect more resource intensive.
- HDRP doesn't disable Screen Space Ambient Occlusion when you enable MSAA, but instead uses non-MSAA depth which can cause issues on edges.
- MSAA doesn't work with the following features. HDRP disables these features when you enable MSAA:
- Screen space reflection (SSR).
- Screen space shadows.
- Temporal Antialiasing.
- Normal Buffer patch up by Decals. It mean Decal which affect material's normal won't affect Screen space reflection (SSR). This isn't a problem as the effect is disabled, see 1.
- MSAA doesn't affect the following features. HDRP doesn't disable these effects, it just doesn't process MSAA for them:
- Post-processing.
- Subsurface scattering.
- Low Resolution Transparency.
- Ray tracing doesn't support MSAA. If you use ray tracing in your project, you are unable to use MSAA.
- The Water System is not compatible with MSAA. If enable the water system in your project, you are unable to use MSAA.
When you enable MSAA in your Unity Project, you must also enable it for your Cameras in their Frame Settings. You can do this either globally or on individual Cameras. To enable MSAA globally, go to Edit > Project Settings > HDRP Default Settings > Frame Settings. To enable MSAA on a per-Camera basis, enable Forward Lit Shader Mode and then enable the MSAA within Forward checkbox. For information on where to find global and local Frame Settings, see the documentation on Frame Settings.
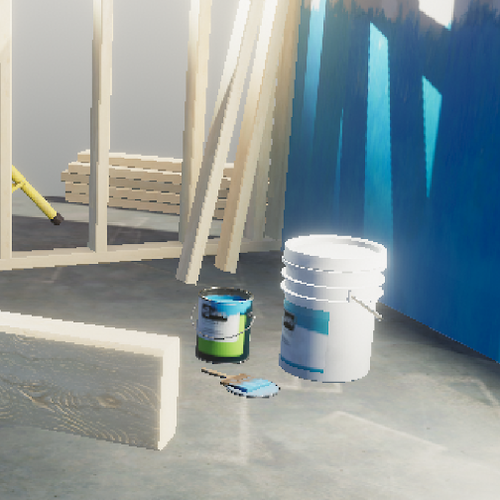
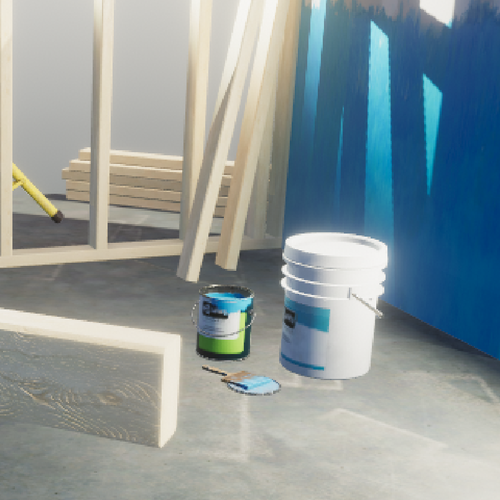
Increasing the MSAA Sample Count produces smoother antialiasing, at the cost of performance. Here are some visual examples showing the effect of the different MSAA Sample Counts:
MSAA Sample Count set to None.
MSAA Sample Count set to MSAA 2X.
MSAA Sample Count set to MSAA 4X.
MSAA Sample Count set to MSAA 8X.


